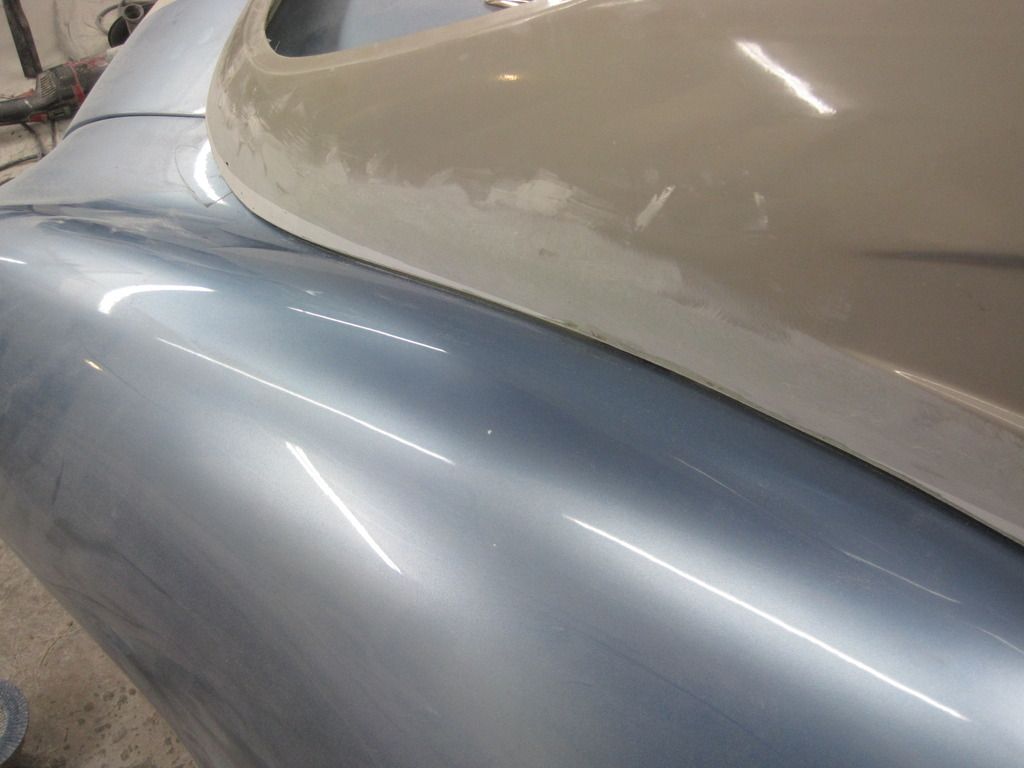
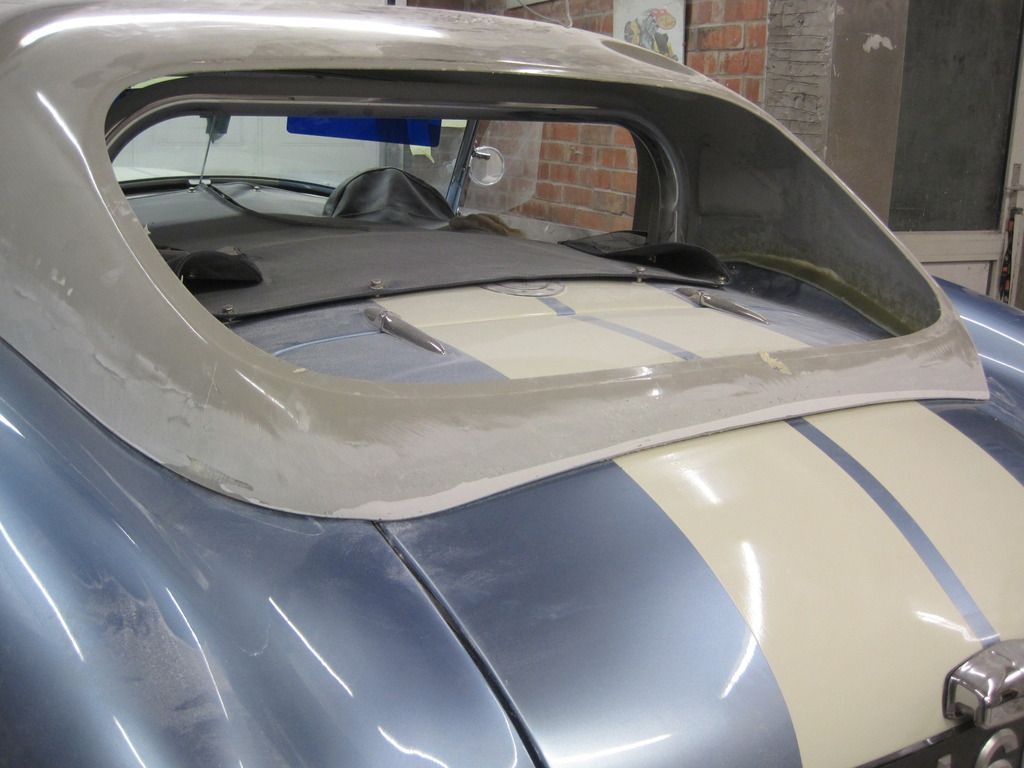
Well, that didn't fit

General Cobra & Ace topics
Post Reply
User avatar
agnoraan
Posts: 1271
Joined: Sun Aug 17, 2014 5:37 pm

Re: Well, that didn't fit

Post by agnoraan »

Thanks Stu, it's getting there slowly :)

It was raining again today so it meant we weren't going out anywhere as a family, which means it was it was "lets play with the Devils spawn", oh, I mean it was fibreglass time.

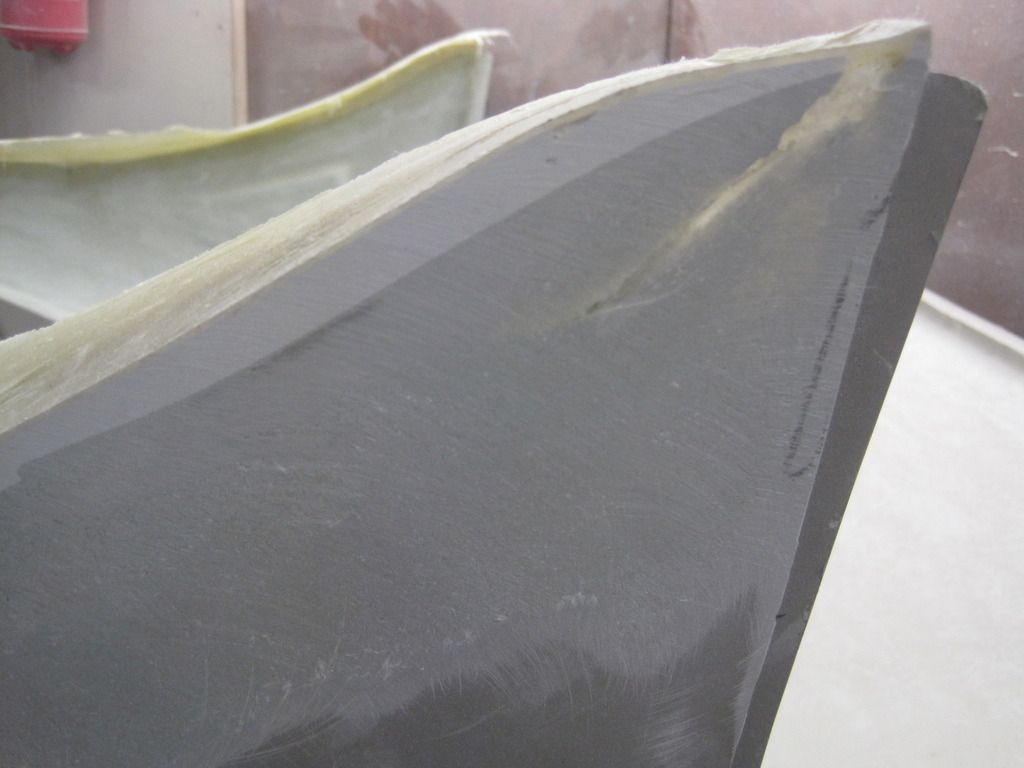
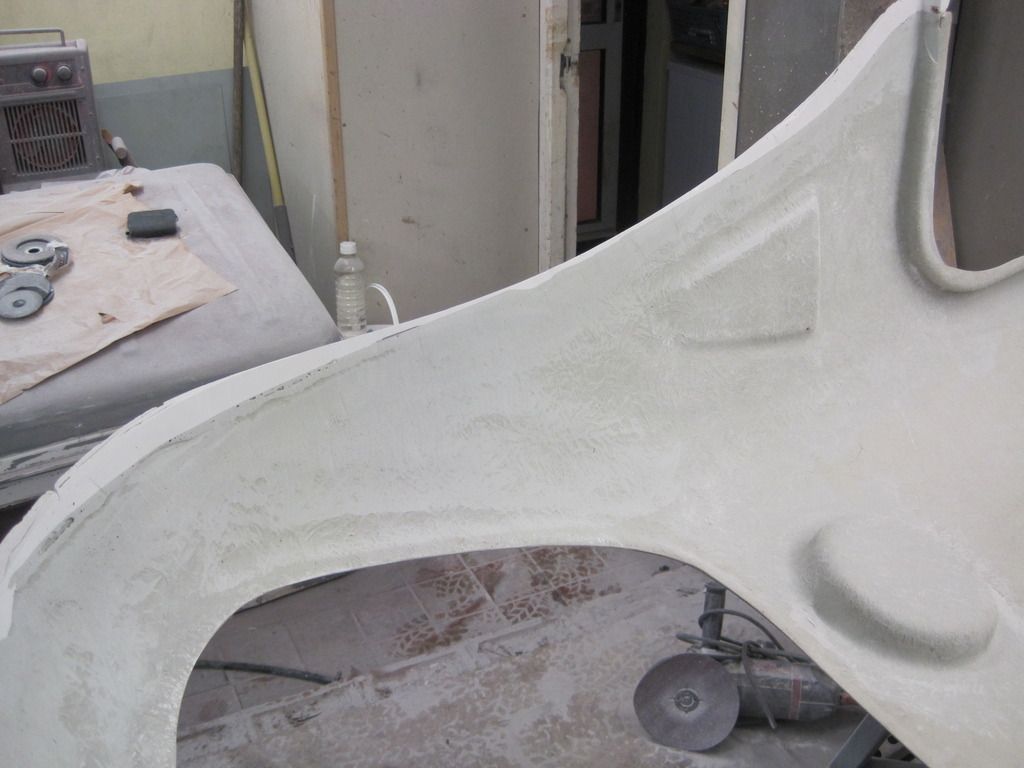
Having ground down the rest of the flange that was left inside the top, and also having ground down the stray bits of filler I ended up with this, a nice smooth area to fibreglass my new flange to. Here you can see the filler that was used previously to bridge the gap between the top and the body. The fact that it's thick on the outside gives me a nice flange and contour to work with


Image


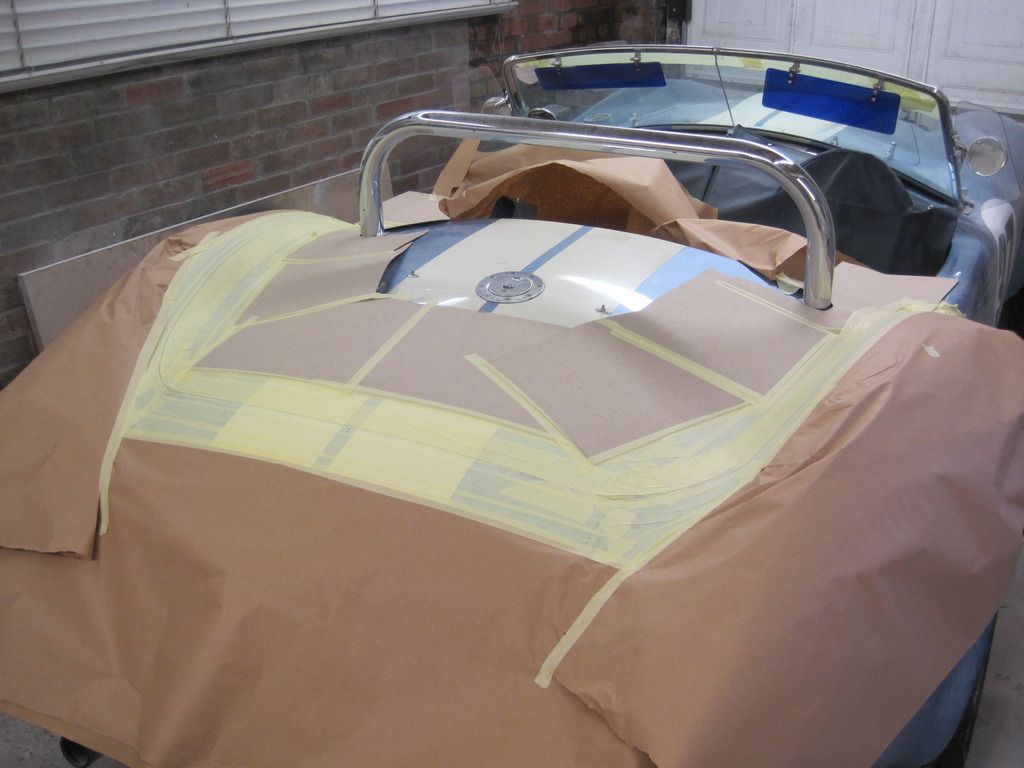
The car was then masked up. I used two layers of 2" tape where the roof was going to touch and then laid out a further three or four widths out from that. The rest of the car was covered with doubled up masking paper and cardboard to protect the surrounding areas

Image


The roof was then placed back on the car, which allowed me to draw a line around the top to give me a guide as to where it was going to fit. The ink is visible through the fibreglass once it's wet, which helps to align everything
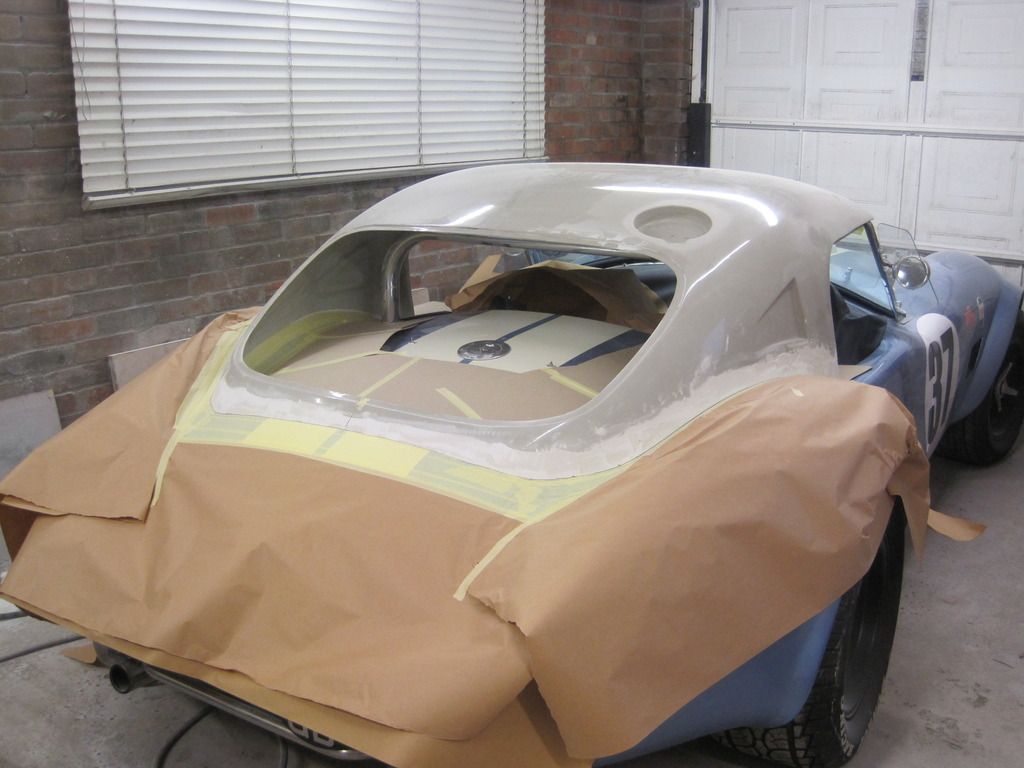

Image


Doing this on my own, with no one free to help me lift the roof into place, I had to get inventive to enable me to fit the roof once the fibreglass was laid onto the body. I duct taped the front of the roof to the screen and then hung the back edge from the garage roof...Voila!!
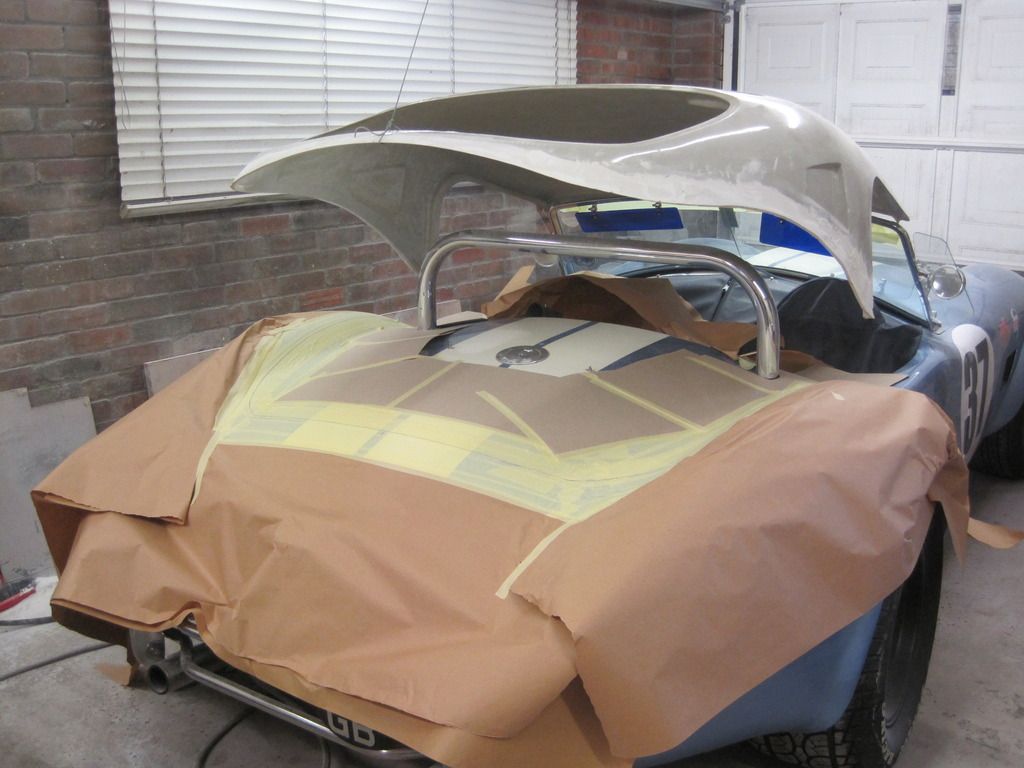

Image


Two layers of fibreglass matt and resin were then applied to the body and then the roof was lowered into position using the ink outline I'd made earlier as a guide. The roof settled nicely into the wet resin, which in itself would give a good chemical bond. Once cured a layer of matt and resin were applied to the inside of the roof to join the new flange to the top itself. It's now sitting in the garage until tomorrow when I can seperate the roof from the body.


Here's the roof set in resin and matt
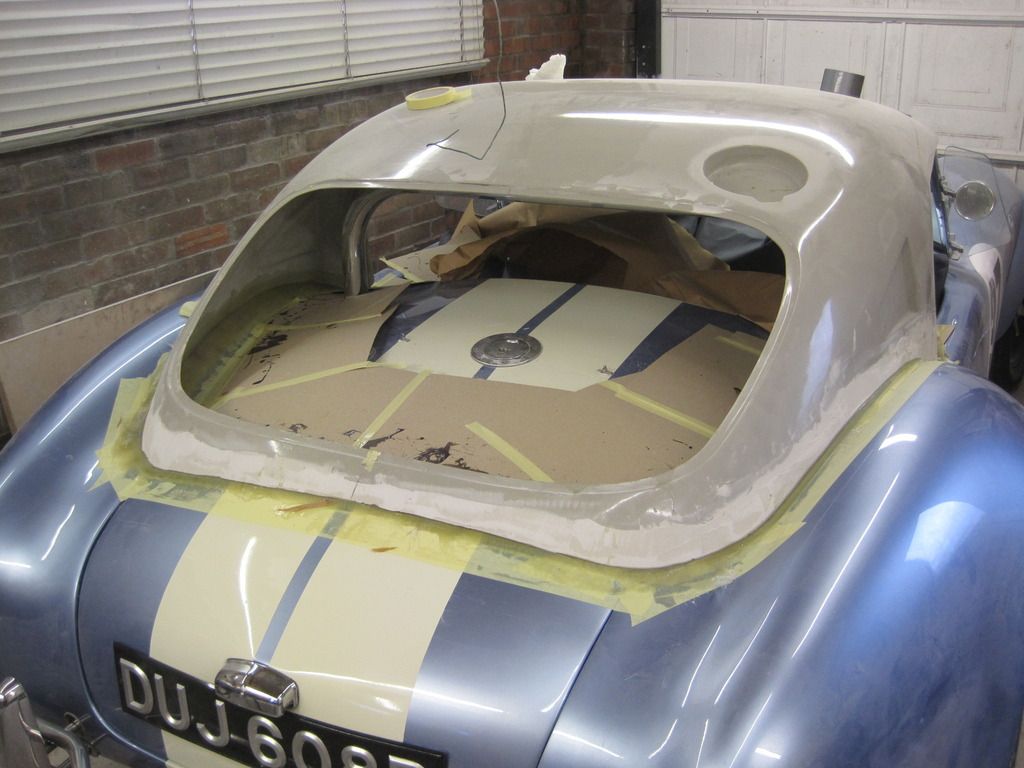

Image


The inside flange 'glassed to the roof
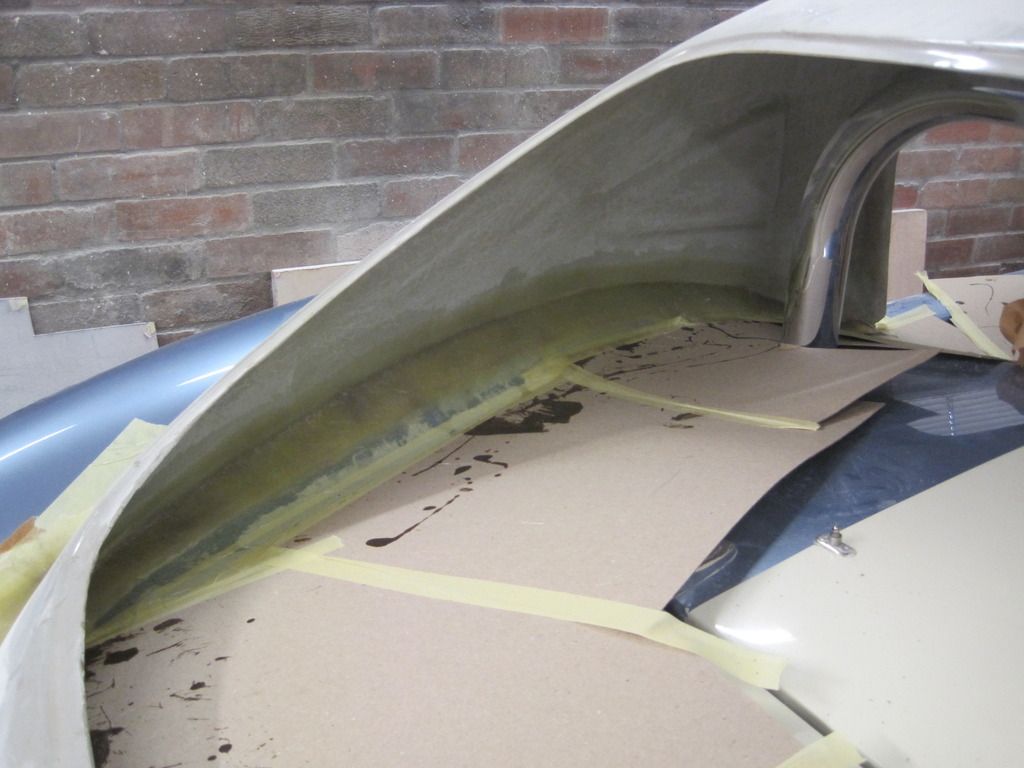

Image


There are other ways that this whole procedure could be done, but I've found this to be a quick and simple way to modify "one offs". Ordinarily, you would take templates of the profiles of the tops of the rear 1/4 panels, then transfer this to sheet steel or aluminium and then rivet or screw these to the roof itself. You would then release wax, and spray on some PVA relaease agent, brush on gel coat, followed by fibreglass, then trim and remove the steel or ali templates, all of which is quite time consuming to get the profiles correct. Instead of this I just used filler take the shape, which only took about 10 minutes to do.

By the same token, the next stage would be to rub the area on the 1/4 panels that the fibreglass is going on to form the flange, with some release wax, and again some PVA release agent, followed by the fibreglassing as above. The problem with this is that the body is painted. Sometimes the fibreglass will not release "cleanly" from the body, and as such, could damage the paintwork. Instead, I used 2" tape as the "barrier" between the fibreglass and the paint/bodywork. Fibreglass will not stick strongly to the tape, which can simply be peeled off once the 'glass has cured. All I will need to do now is to sand down the excess filler on the outside of the roof and trim the flange to the desired size. I'll then use a foam/rubber seal stuck to the flange to protect the body once the top is fitted :D Total time to get to this stage was just four hours spread over two days Yay!! :D

cheers..Nige

EDIT One thing I forgot to say was that don't add too much catalyst to the resin as it will make the fibrglass get hot as it cures, which could be detrimental to the painted finish. I always err on the side of caution and add just enough catalyst to give a slow curing mix. If you try something similar at home, please don't blame me if there are any problems. The above is only a guide as to how I did it :wink:
Last edited by agnoraan on Sun Jan 10, 2016 6:17 pm, edited 2 times in total.
catsx11
Posts: 657
Joined: Sun Feb 02, 2014 10:00 pm

Post by catsx11 »

.
Last edited by catsx11 on Wed Aug 23, 2017 6:54 pm, edited 1 time in total.
User avatar
Phil Riley
Posts: 550
Joined: Fri May 16, 2008 5:33 pm
Location: Peak District

Re: Well, that didn't fit

Post by Phil Riley »

I am watching and learning :)
User avatar
agnoraan
Posts: 1271
Joined: Sun Aug 17, 2014 5:37 pm

Re: Well, that didn't fit

Post by agnoraan »

philriley427 wrote:I am watching and learning :)
Now why is that Phil?? :lol:

cheers...Nige
User avatar
agnoraan
Posts: 1271
Joined: Sun Aug 17, 2014 5:37 pm

Re: Well, that didn't fit

Post by agnoraan »

catsx11 wrote:That method is ingenious
the lowering of the roof onto the wet fibre-glass and bonding from the inside with the bodywork masked, to form the flange - you make it look so simple!
Great progress!
Thanks Alan, having owned my own fibreglass laminating shop for a good number of years, you tend to learn a lot of quick and easy "cheats", Though it's probably not seen to be the "correct" method, it's far quicker and simper to do this way, but with the same end result :wink:


cheers...Nige
Paul Blore
Posts: 2077
Joined: Sat Nov 15, 2008 8:20 pm
Location: Leicestershire, UK
Contact:

Re: Well, that didn't fit

Post by Paul Blore »

Brilliant. :D

Paul
User avatar
agnoraan
Posts: 1271
Joined: Sun Aug 17, 2014 5:37 pm

Re: Well, that didn't fit

Post by agnoraan »

Thanks Paul, I just wanted to give a small insight into how things can be modified, whilst offering some guidance on how to work with fibreglass and basic bodywork


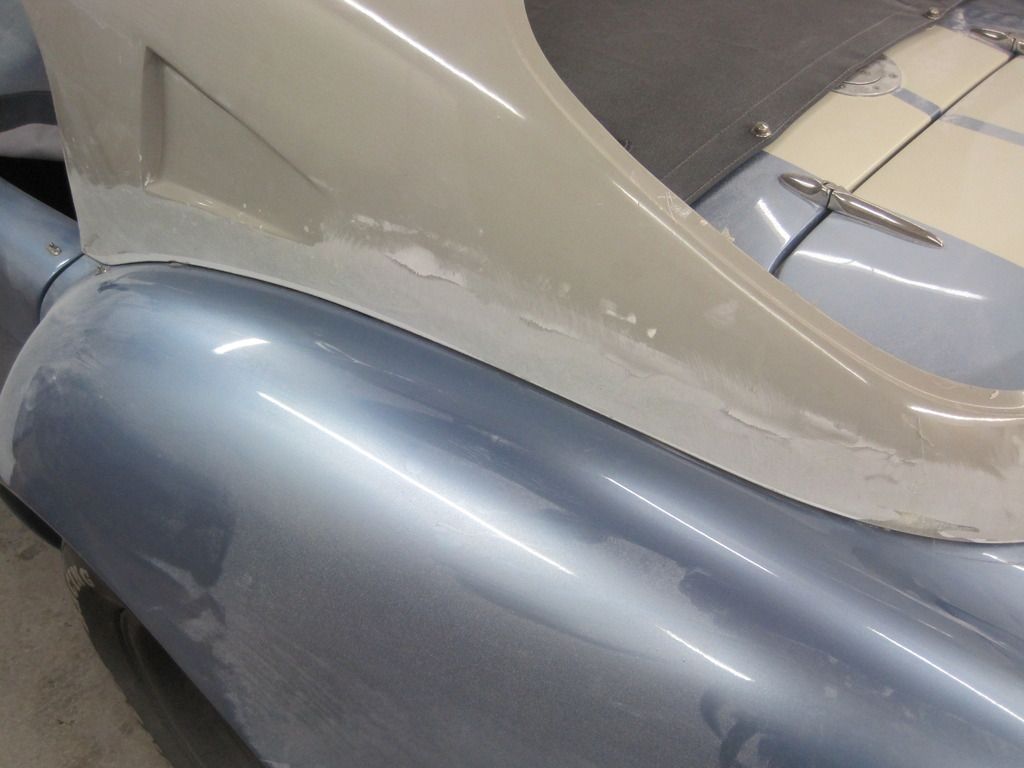
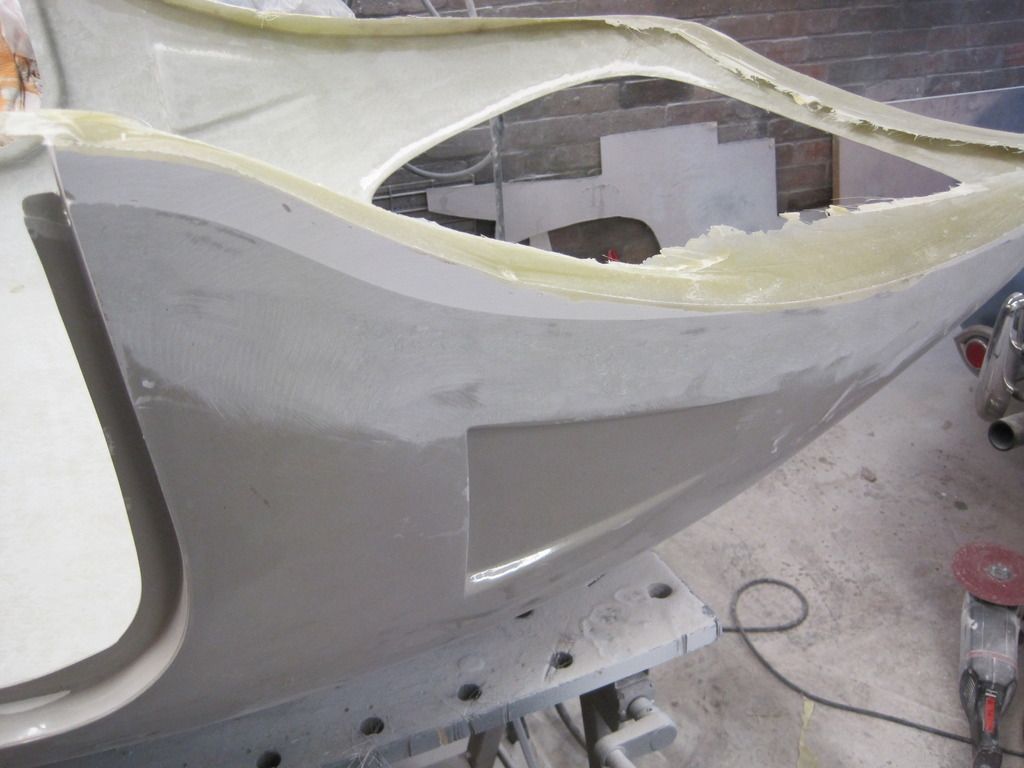
I had a bit of spare time today so I figured it'd be good to get the top all trimmed up. As it stood, it still had the excess bodyfiller that I'd used to fill the gaps between the roof and the 1/4 panels on the outside of the roof. After sanding down the filler back to the level of the original fibreglass you can now see how far out the difference was to a 289 body and the Viper, by the contours of body filler showing. The strange thing is, is that the distance betweeen the door top and the roof itself is that same as an FIA, so something on the Viper shell is way different to a 289.

The filler that is visible is now only the thickness of the original fibreglass The benefit of doing it the way that I have, is that this filler is now backed up with the fibreglass I applied on the inside, so the outside repairs will now be minimal. Even if you were to profile it with steel or aluminium and to use release wax and PVA etc, you would still need to repair the joint between the roof and the fresh gel coat/fibreglass that had been added.


Image

In sanding down the filler, I found that as soon as I sanded the original fibreglass, I found a huge void between the gel coat and the fibreglass. This is where an air pocket is accidentally formed in the original manufacture of the roof. Had this been left undiscovered, this area would bubble up in heat or sunlight as the air trapped in the void tries to expand, which would ruin the paintwork. Luckily, having found this I can repair it so that there are no issues in the future. I'll run some heat over the roof until it's really warm to check for any other voids with trapped air pockets coming to the surface.


Image


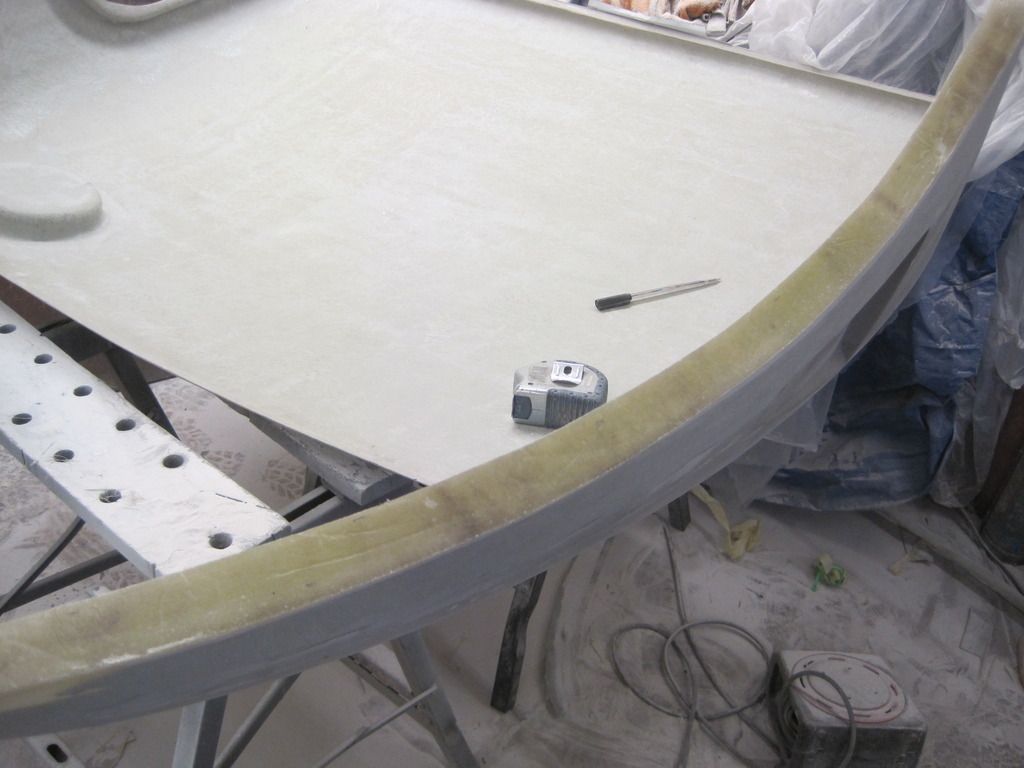
A distance of 35mm was marked from the outside edge of the roof and that was used as the cut line to trim to. The foam seal I'll be using is 25mm wide, so once the roof is all repaired up I can maybe trim this a little tighter to 25 mm. It's always better to give things a final trim after all repairs are finished.


Image


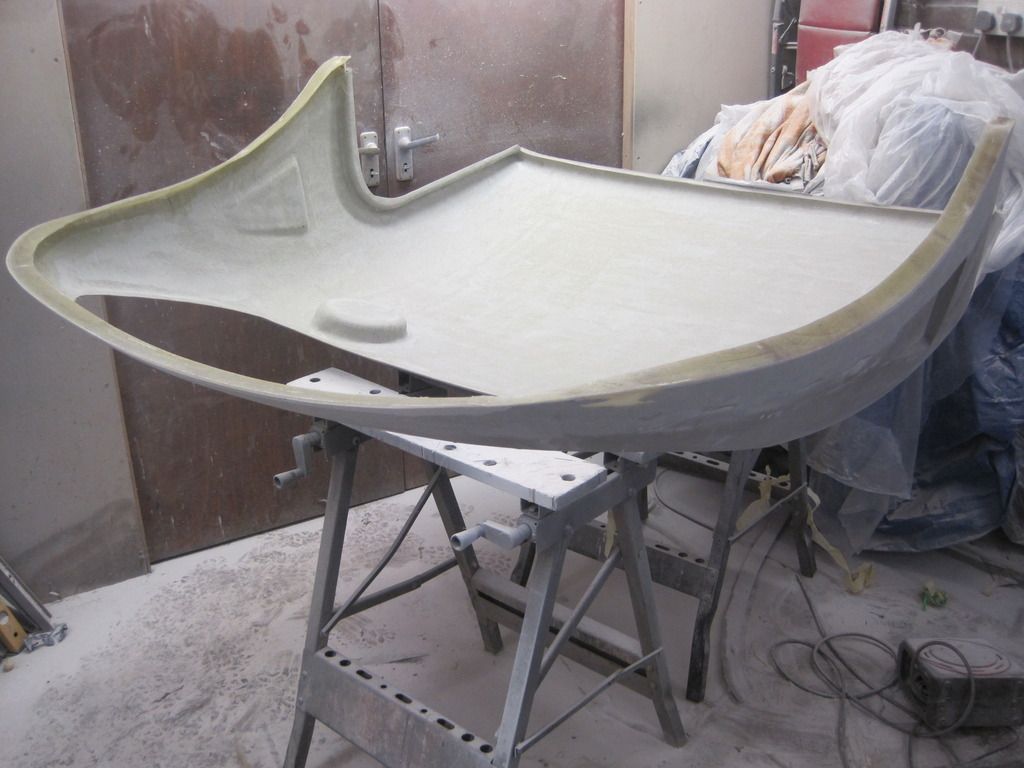
The roof with its new trimmed flange


Image


This was the point that I started getting carried away. I figured it would look nice to have a smooth painted finish on the inside of the roof rather than rough fibreglass. I didn't want to fit a headliner and didn't want to line it with any form of material. Sooo, I've now started to lay a bit of filler over the inside ready to be sanded back smooth tomorrow


Image


What do most people do with the inside of a fibreglass roof??

Thankfully that the major part of the fibreglassing finished with. Whilst it's extremely versatile, it's not the most pleasant medium to work with and I'm glad to see the end of that :D

cheers..Nige
Last edited by agnoraan on Sun Jan 31, 2016 1:39 pm, edited 1 time in total.
User avatar
agnoraan
Posts: 1271
Joined: Sun Aug 17, 2014 5:37 pm

Re: Well, that didn't fit

Post by agnoraan »

I popped the roof back on late last night and the gaps have come out really nice, just a little fine tuning and they'll be good to go.


Image


Image


Image


cheers...NIge
User avatar
Roger King
Posts: 4396
Joined: Mon Mar 19, 2007 10:29 pm
Location: St Ives, Cambs

Re: Well, that didn't fit

Post by Roger King »

Nige, if you kept the duct tape 'hinges' and made a simple sliding mechanism, you could keep the bootlid as it is...

...coat within reach, so...
User avatar
agnoraan
Posts: 1271
Joined: Sun Aug 17, 2014 5:37 pm

Re: Well, that didn't fit

Post by agnoraan »

Nice one Rog, but don't think I hadn't thought of that :wink: :lol:

cheers..Nige
Post Reply